A Step-by-Step Guide to Installing Sitecore CMS 10.2: Building the Foundation for Digital Success
“Sitecore is a leading digital experience software used by organizations globally to create seamless, personalized digital experiences. Sitecore is an integrated platform powered by .Net CMS, commerce, and digital marketing tools.”
System Configuration Required for Any Version of Sitecore Installation:
Operating System: Windows 10 Pro (64-Bit), Windows 11 Professional (64-Bit).
Processor: Core I5, 7th Generation.
RAM: Minimum 16 GB.
Storage: Minimum 500GB (Hard disk).
Visual Studio: 2019, 2022.
MS SQL Management System: 2017, 2019.
Steps for Sitecore 10.2 Installation:
Step 1:
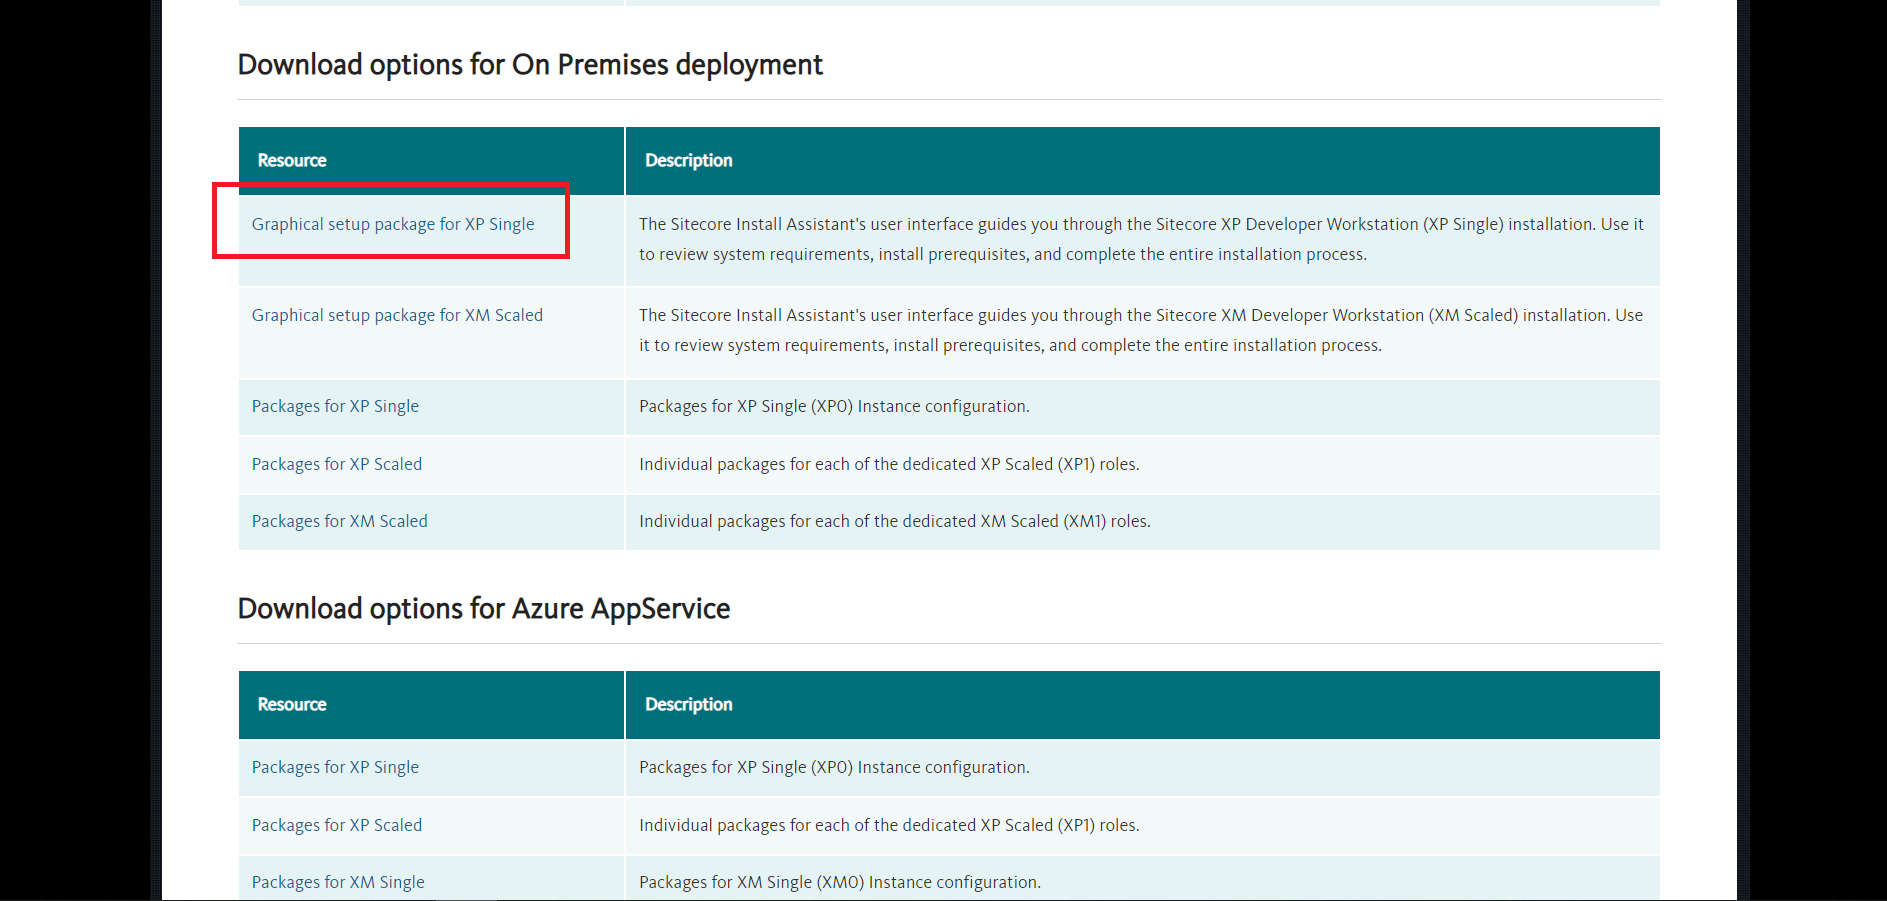
Click on “Graphical setup package for XP Single” from Download Sitecore Experience Platform 10.2 and click “I Accept” and it will download in a .rar file.
Step 2:
Now open the “Prerequisites.json” file from the extract folder in Notepad. Change in the link if need to change “https://download.microsoft.com/download/8/4/9/849DBCF2-DFD9-49F5-9A19-9AEE5B29341A/WebPlatformInstaller_x64_en-US.msi” in “WebPlatformDownload”
Step 3:
Click on Right-click “setup.exe” to Run as administrator and click “Start”. Click on the “Install” button to install the Prerequisites of Sitecore Install Framework (SIF) and Windows Server Prerequisites. If it is already installed on your system, you can proceed by clicking directly on the “Skip” button.
Step 4: Solr Install
If you are installing for the first time, you can install Solr without changing the “Solr Port.” However, for subsequent installations, make sure to change the port each time. After filling in the service name in “Windows service and path prefix”, set the file path to the location we set. Then click “Install.” However, if Solr is already installed on the system, simply click on the “Skip” button.
Step 5:
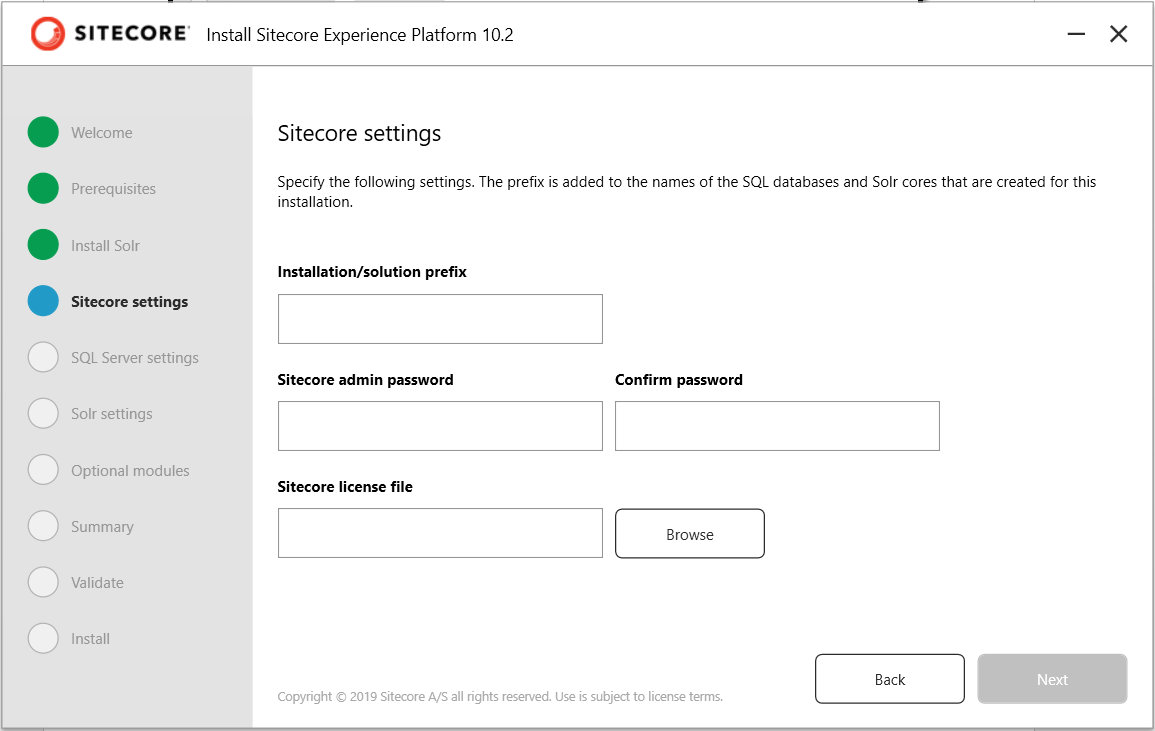
After solr installation move to the next step “Sitecore Setting”. Fill in the Sitecore domain name in “Installation/Solution Prefix”. Then set the Sitecore login password in “Sitecore Admin Password” and also fill same “Confirm Password”. The last step is to upload the License file in “Sitecore License File”, click the browse button and choose the license file which is provided by Admin.
Step 6: SQL Server Settings
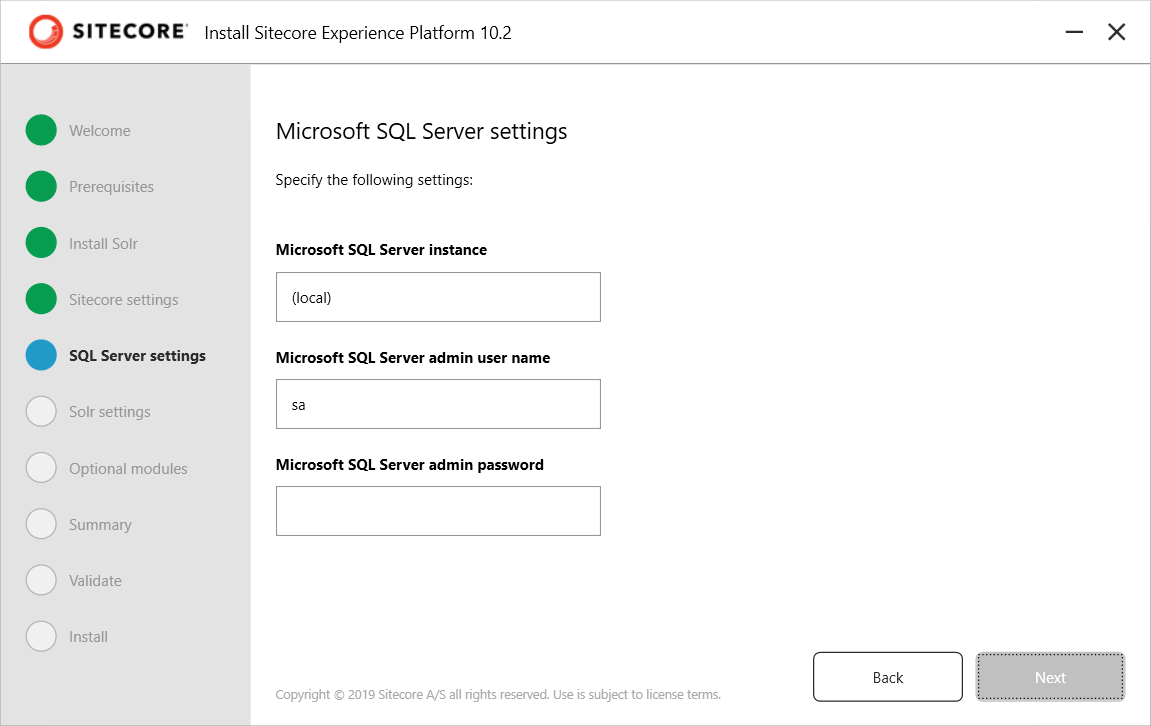
First fill in the “Microsoft SQL Server Instance” means Copy the Sql Server Name in the MS Sql Management Server and paste it here. Then, after filling in the “Microsoft SQL Server Admin User Name,” which is provided by default as “sa” by Sitecore, enter the Username that we have previously set in the SQL management server. After setting the “Microsoft SQL Server Admin Password” in the SQL management server, fill it in the provided field.
Step 7: Solr Settings
In this Screenshot show “Solr Setting”. First, we need to check the “Solr Service URL.” To do this, copy the provided link of Solr and paste it into your browser’s address bar. If installed successfully, Solr will be displayed in the browser as follows…
Step 8: Optional Modules
In the “Optional Modules” tab show “Sitecore Experience Accelerator (SXA)” with Checkbox, Check the checkbox for installation “SXA”.
Step 9: Summary
This is a summary that informs us what is our “Installation/Solution Prefix”, “License File”, “SQL Server Instance”, “SQL Server admin Username”, “Solr Service URL”, “Solr file system Root” and “Solr Windows Service name”. Afterward, click on the “Next” button.
Step 10: Validate
During this step, the system conducts a thorough validation of all types of files and connections, including “License, Configuration,” “WDP,” “SQL Server Connection and User role,” and “Solr Connection,” ensuring their validity and integrity. It also indicates whether each component is running successfully or not.If any error occurs in any part give us in Red Line.
Step 11:
This is the last step of “Sitecore10.2 Installation”. It Installation in runs in 2 parts…
In this step, the setup will proceed to install Sitecore XP 10.2 on your PC, which may take some time. If any errors occur during the installation, the system will display them under the Installation Status Log.
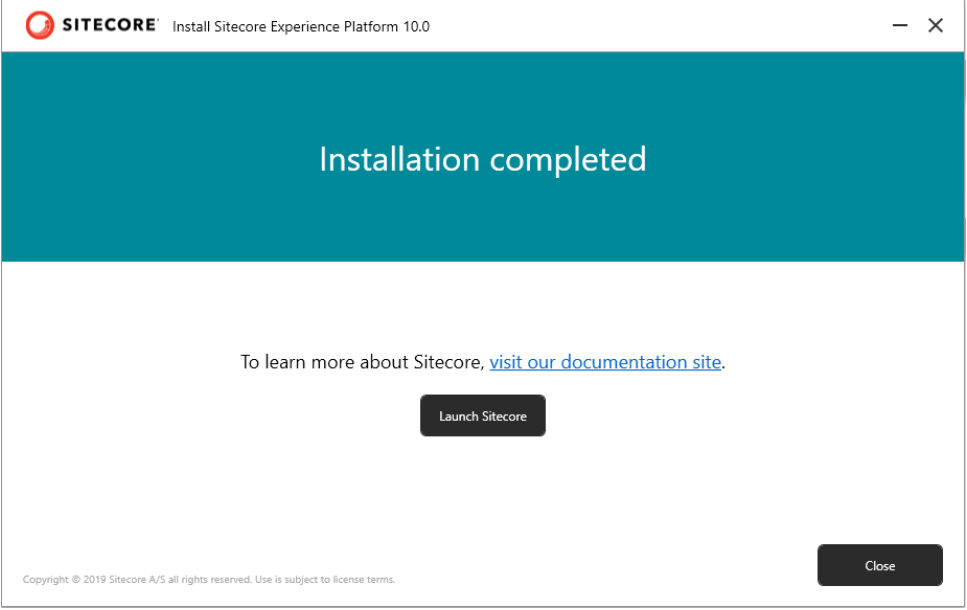
After successful installation, it will show the below Screen, Click on the “Launch Sitecore” Button.
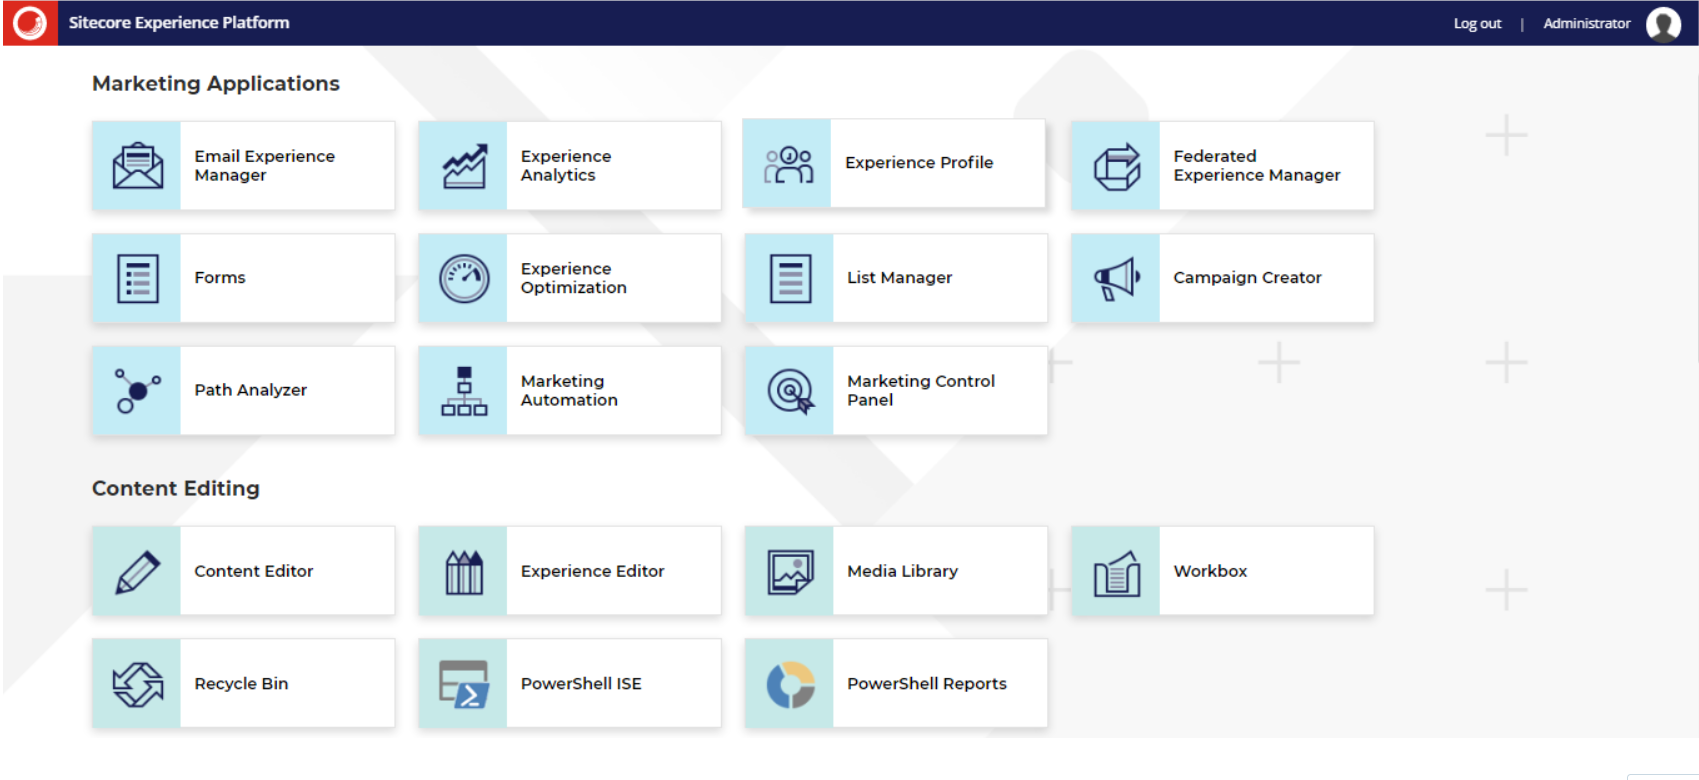
Now click on the Launch Sitecore button, to access your Sitecore 10.2 CMS. Upon clicking the Launch Sitecore button, the interface of the Sitecore launchpad will be revealed in the browser, as shown in the image below.
Conclusion:
Installing Sitecore CMS 10.2 is a significant step towards building a robust and personalized digital experience platform for your business. By following our comprehensive step-by-step guide, you can ensure a smooth installation process and, in addition, leverage the powerful features of Sitecore CMS 10.2 to create memorable and impactful online experiences for your customers. Embark on this journey with us and unlock the full potential of Sitecore CMS 10.2 to achieve digital success.


