Sitecore Roles and Access Permissions with Azure AD
Sitecore provides the feature for User Roles, Roles are a collection of permissions that administrators assign to users or user groups and we need to assign access permissions to the Sitecore Page or an Item.
Where is the Role option available in Sitecore?
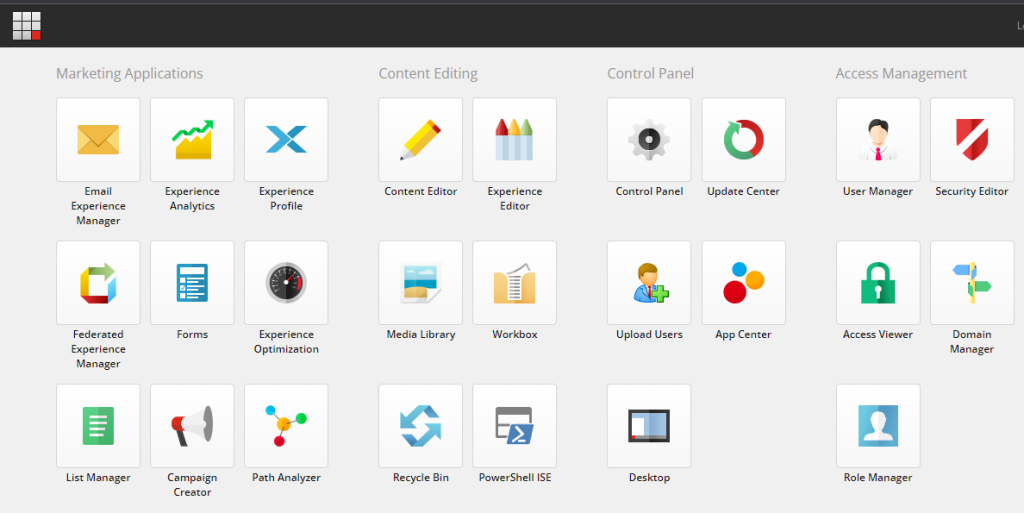
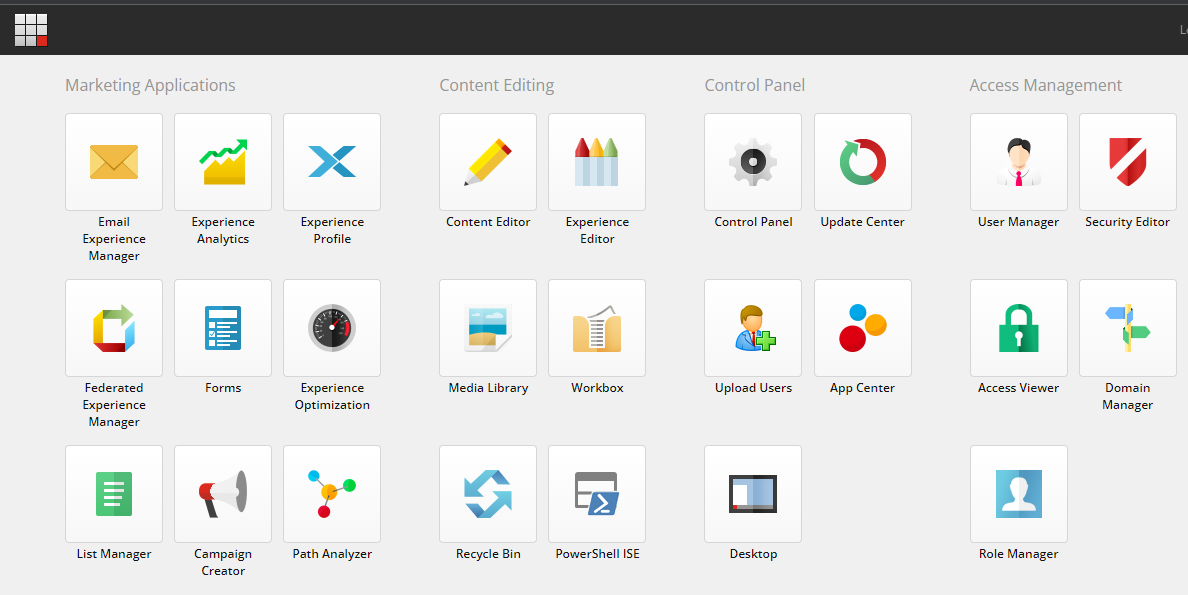
In Sitecore, a Role Option is available at Sitecore launchpad with the name “Role Manager”.
Role Manager:
The role manager option is also available or accessible from the “User Manager” and “Security Editor”. Users can have defined any number of roles in Role Manager, but It should be defined using Domain Manager.
A domain is nothing, it’s used to identify the particular sites in the Sitecore as we know, In Sitecore SXA we can have defined multiple sites and also need to assign the domain to each site.
For Creating a new role double-click on “Role Manager”, it will open a window,
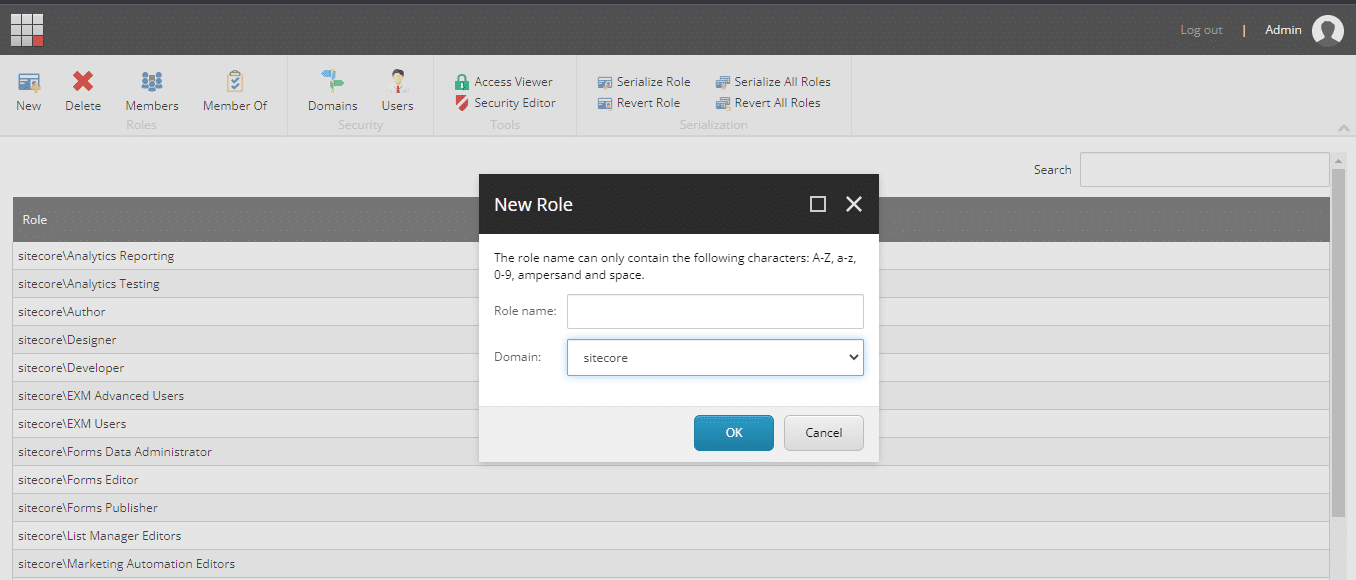
Select “New” from the menu and you will another window with the name “New Role”,
In this window define “Role name” and select “Domain”, its displays domain names that are defined in the domain manager.
Then click on “Ok” and it will add a new role with the selected domain name, which is shown in the “Role” list table.
The role is created now; we have to define the access rights or permissions to this role.
Now the question is from where we can assign or define the permissions to the role in Sitecore?
For that, In Sitecore, there is an option “Security Editor”,
from where we can define access rights or permissions to access the particular Item or page to the selected Role.
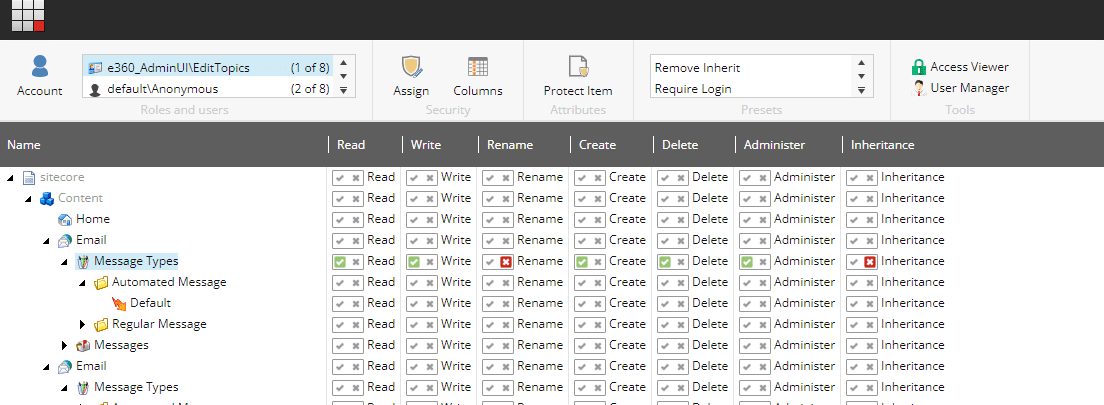
Different types of permissions such as Read, Write, Create, Rename, Delete, and Administer Inheritance are available.
Access right defines using simply clickable right and close icons on an individual’s defined access rights.
“Right” icon buttons will assign and “Close” icon buttons will deny access to an item for a selected role.
Select the “Assign” option it will open another window which will have a name like, “Assign Security Rights” the same as below,
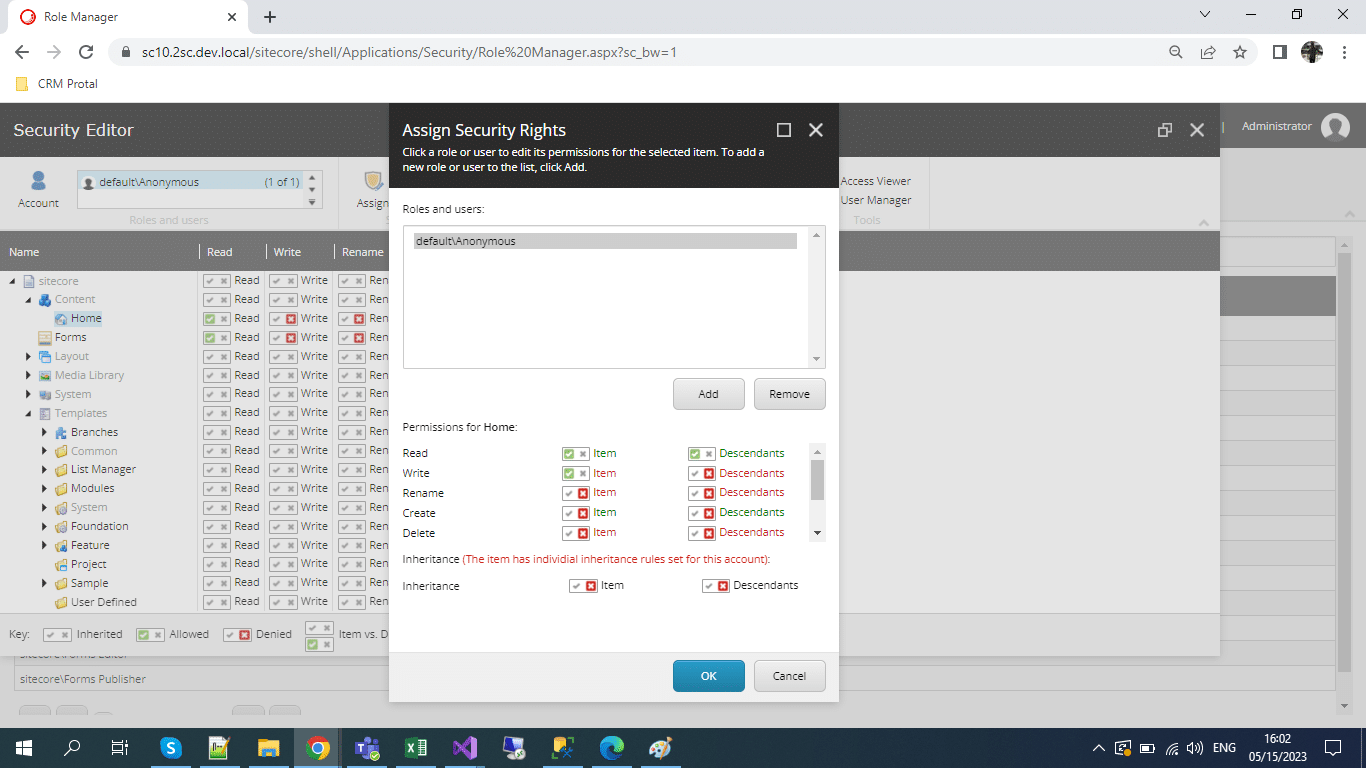
For that we can use different authentication methods, we will use “Azure AD “ to authorize users using Sitecore Roles.
For that we need to create Azure Active Directory (AD) in Azure DevOps, Active Directory is an identity service that provides a single Sign-In service and authentication.
Azure Active Directory:
To create an Active Directory in Azure DevOps, you need to define and create your web application for that purpose. First, open Azure DevOps https://portal.azure.com/#home there will be an “Azure Active Directory” option available using “Azure Active Directory”, we need to create one Azure AD and in that, we have to define AD Groups. We utilize groups to map Azure users, as they serve as a type of role where we add Azure members to them.
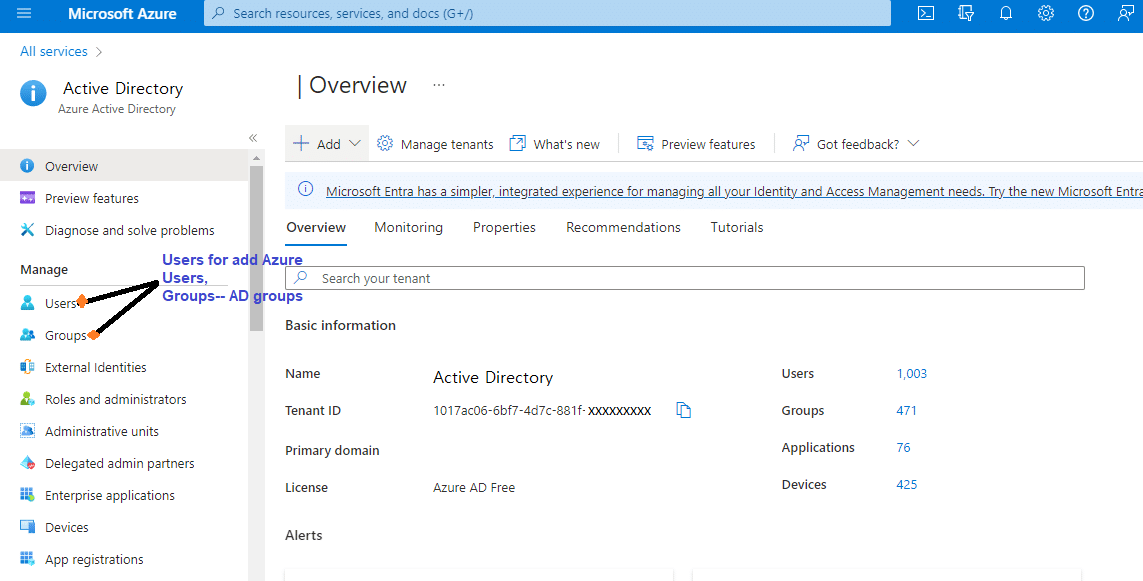
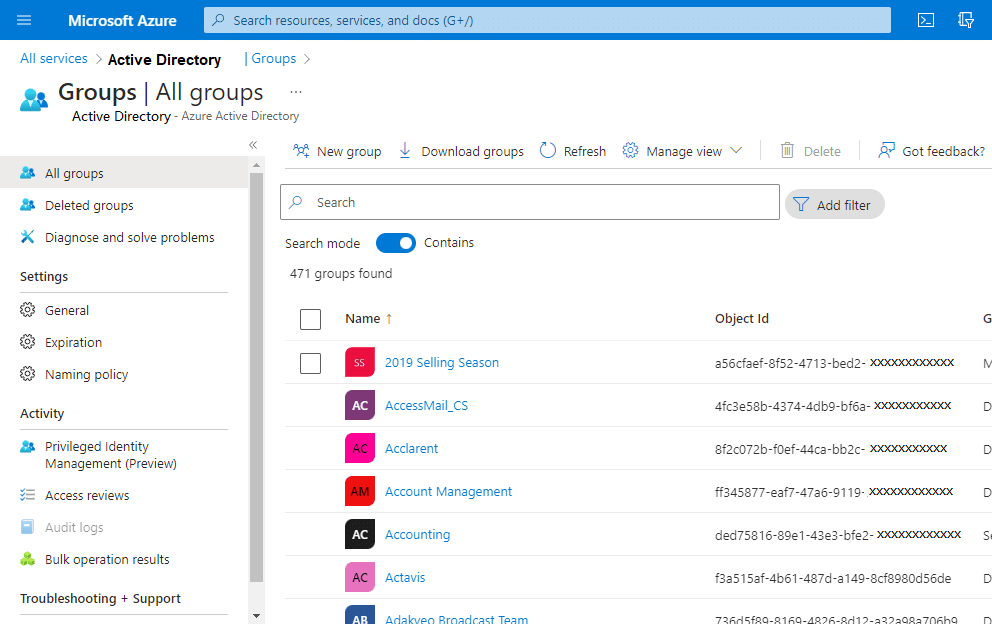
To create different groups based on roles, we must also add “Users” into those groups to effectively manage access and permissions.
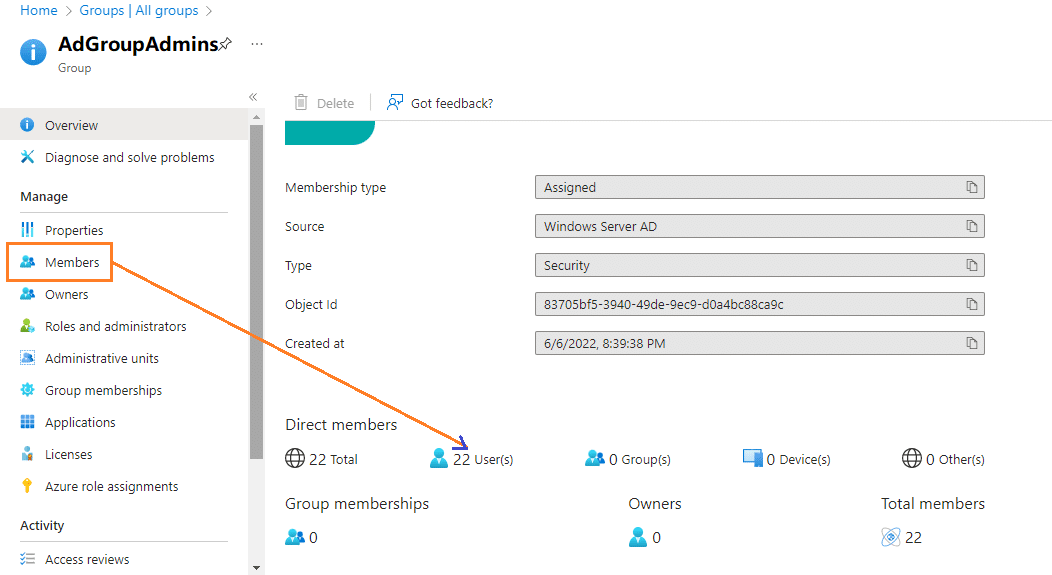
For adding or removing members or Users we have to use the “Members” option. It will open a new page as below and where we can manage the Users of that particular Azure AD Group.

We need to map the Sitecore Roles with Azure AD Groups to authenticate users. Let’s delve into how we can accomplish this process here.
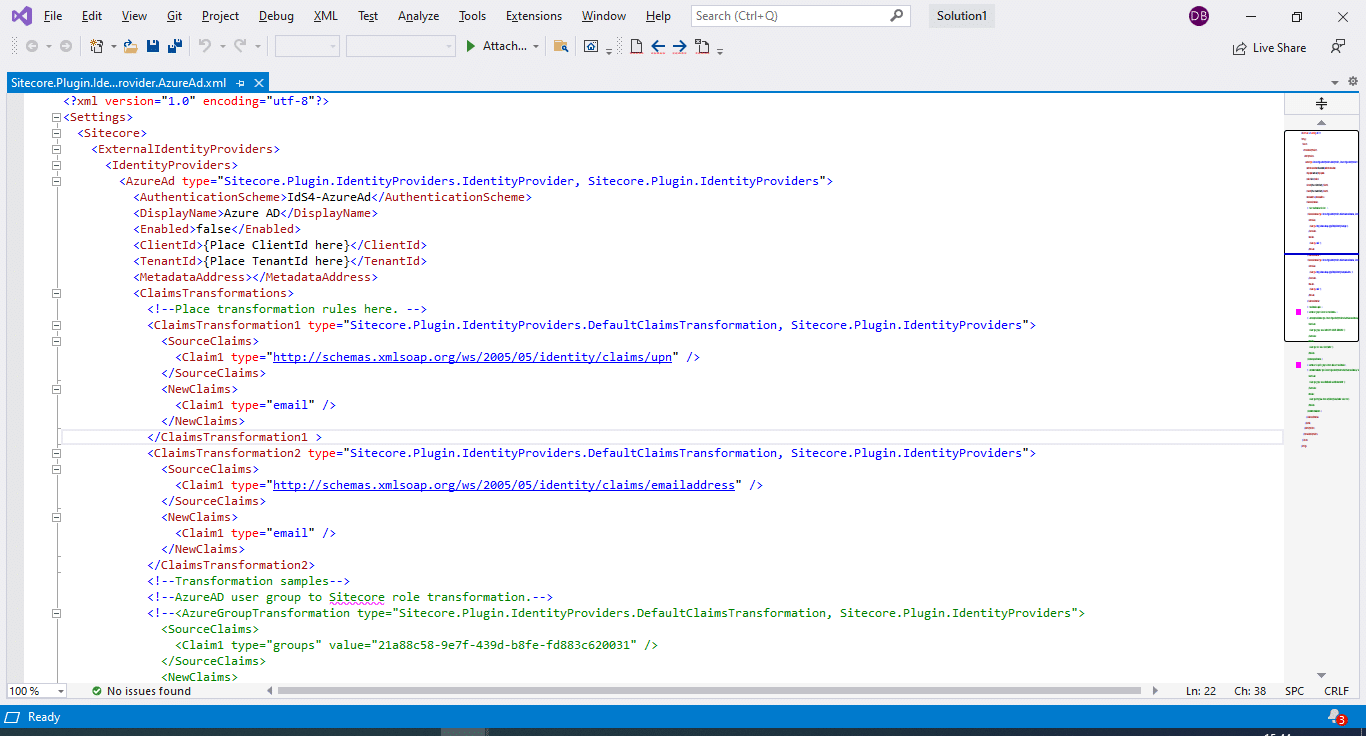
First in the Sitecore web application, publishing directory, there is the “IdentityServer” project folder into “C:\inetpub\wwwroot”.
In this folder, open the “Sitecore” folder, then open “Sitecore.Plugin.IdentityProvider.AzureAd” folder which contains the Azure AD configuration file with the name “Sitecore.Plugin.IdentityProvider.AzureAd.xml”
In this use to set the Azure AD configurations, this file we have to define AD Groups and need to map them with Sitecore roles.
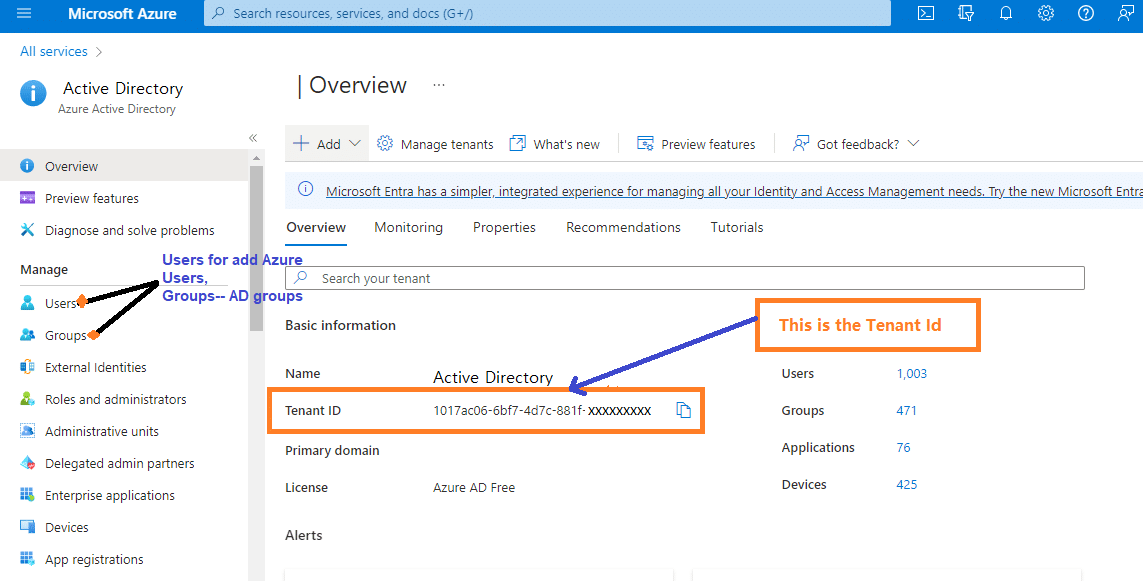
Before it, need to define the value of Client Id and Tenant Id, which will define in Azure AD.
You will find the “Tenant Id” in your Azure Active Directory.
- Open the Azure Portal,
- Clicking on the Azure Active Directory on the Home page will open a new screen where you can find the “Tenant Id.”
-
To find the Azure Application’s “Client Id,” you need to navigate to the “App Registration” section. By conducting a search for the application name created, you can access a wealth of information, including the following details:
“Application (Client) ID” which will be your “Client Id” and this ID we need to set in the Azure AD configuration file.
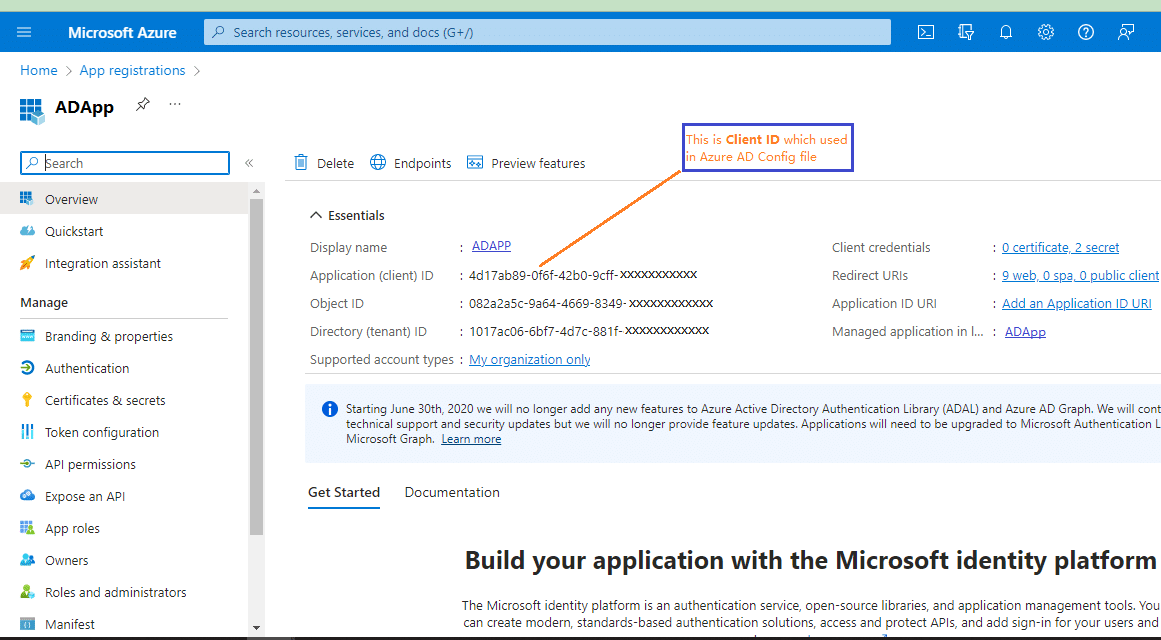
Regarding Mapping Sitecore Roles with Azure AD Groups:
We’ll add a new claim mapping shown below. This is to our setup on the Sitecore Identity server in the Sitecore.Plugin.IdentityProvider.AzureAd.xml file in the /Sitecore/Sitecore.Plugin.IdentityProvider.AzureAd/Config folder:
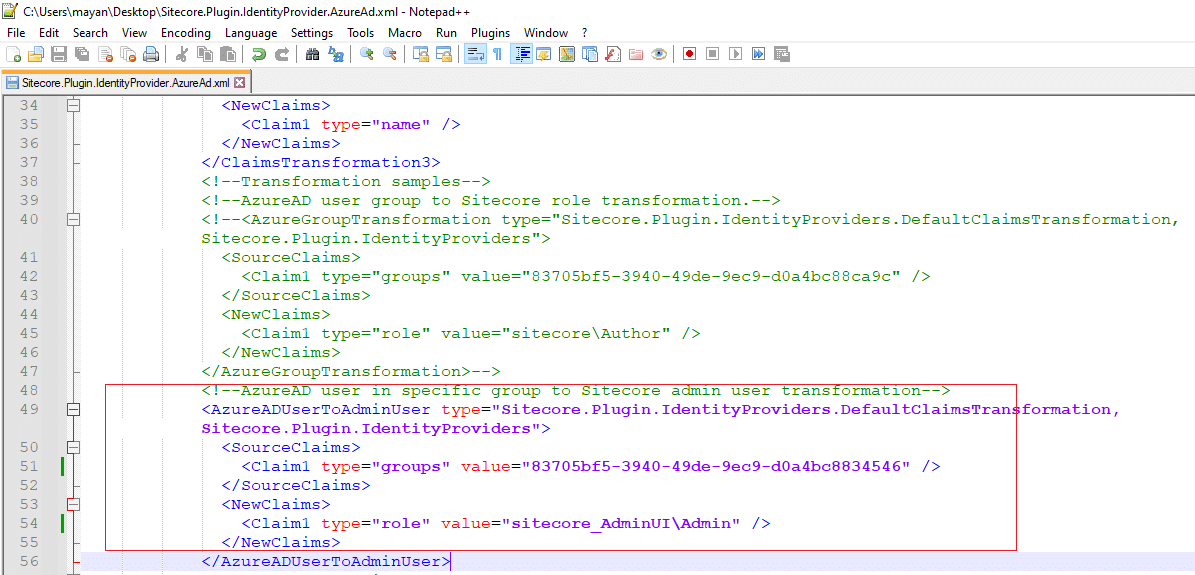
After updating Sitecore.Plugin.IdentityProvider.AzureAd.xml file we must have to restart your websites from Internet Information Service(IIS).
To initiate a restart for both the IdentityServer website and our main Sitecore web application or site. We need to follow a systematic process that ensures a seamless and efficient relaunch. It is imperative that we list our websites under the designated main Sites folder. By doing so, we can ensure smooth and error-free execution of the restart process. For minimizing any potential disruptions and maximizing the overall effectiveness of the relaunch. Additionally, this structured approach enables us to efficiently manage and optimize the performance of our web assets.
Once you implement the modifications, your primary Sitecore web application will reflect them. These are the information and steps I have defined above for using Roles and permissions in Sitecore SXA.
We hope this information helps you. Thanks!!!


